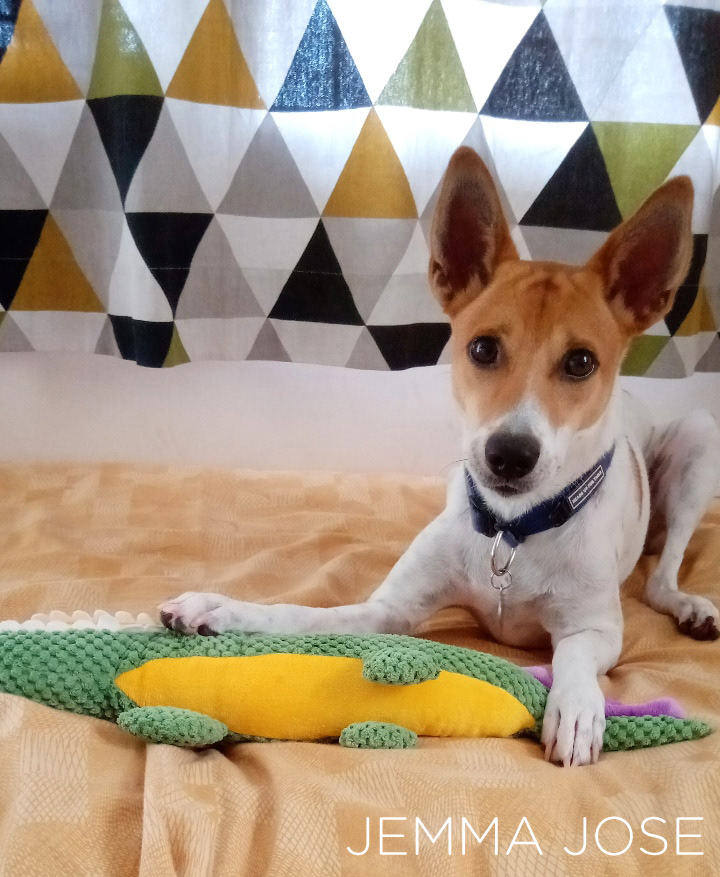
Say hello to Roku! He's my little Indie dog whom I adopted in 2019 and the main star of a lot of my personal artwork. Life is never dull when you have a pupper because even their most mundane actions can be turned a good story. I share comics about him and our life together on my Instagram page and, I'd like to show how I make a Roku comic for social media.
All my comics start with...
All my comics start with...
Writing
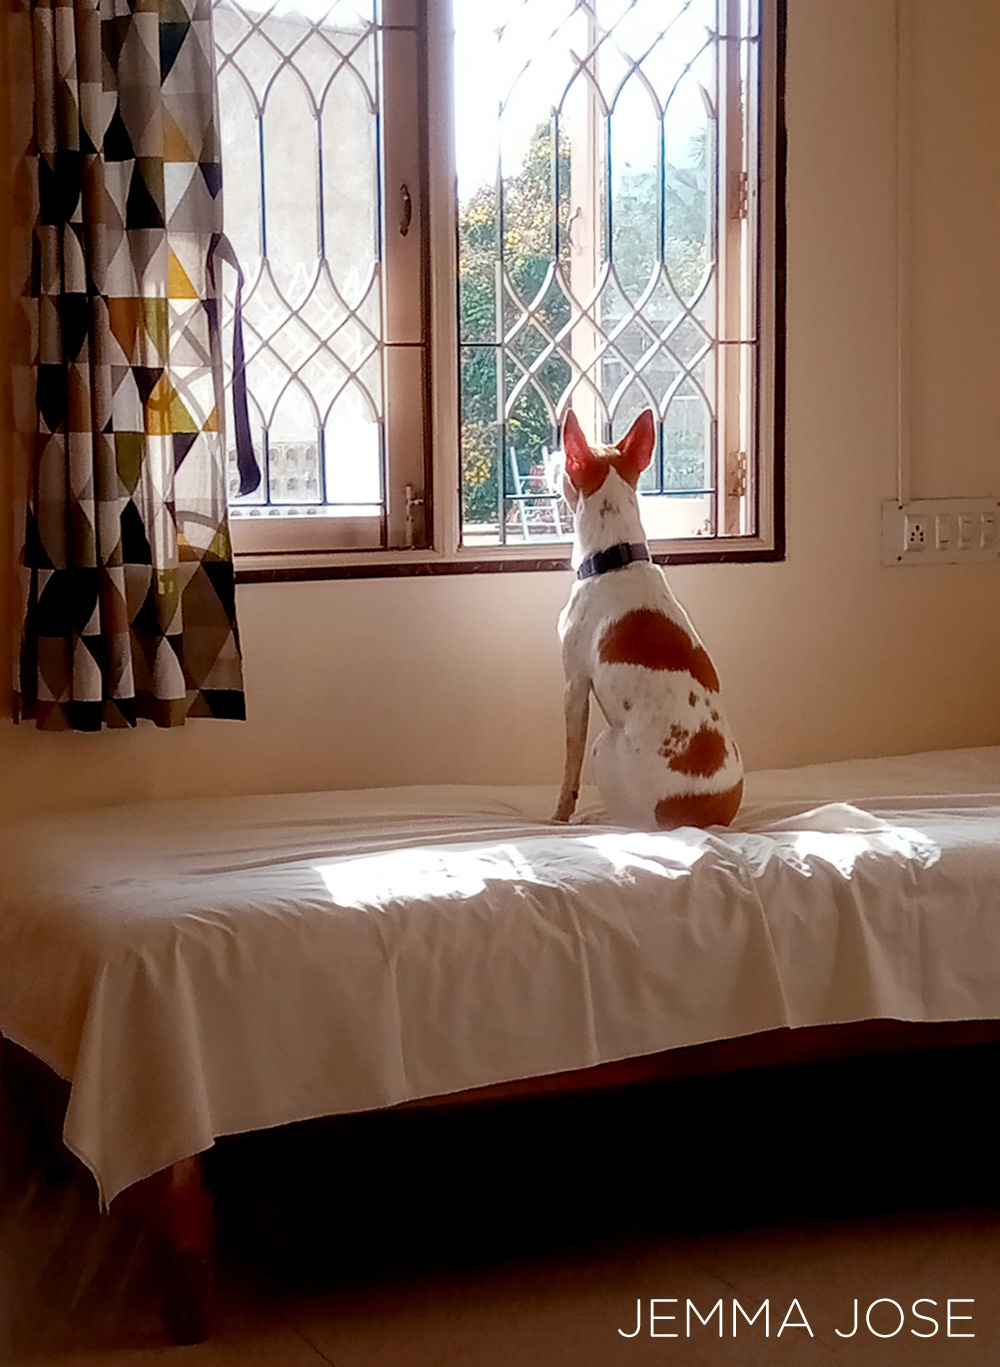
Most of my ideas come from simple observation and are inspired by real-life incidents and I like to flesh out a story in words before making any drawings. The comic below, was inspired by Roku looking out of windows. I see him do this everyday and it got me thinking: what's going through his head while he looks outside? Is he admiring the cityscape? Or cursing a bird on a wire? These observations helped me form a story that I could tell through Roku's 'mind-voice' or his internal monologue.
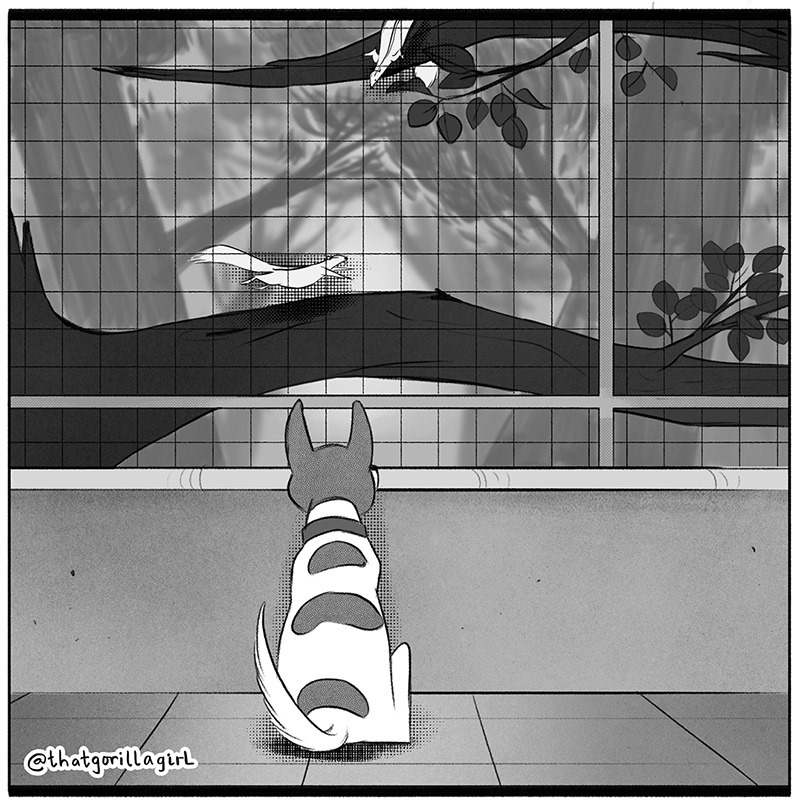
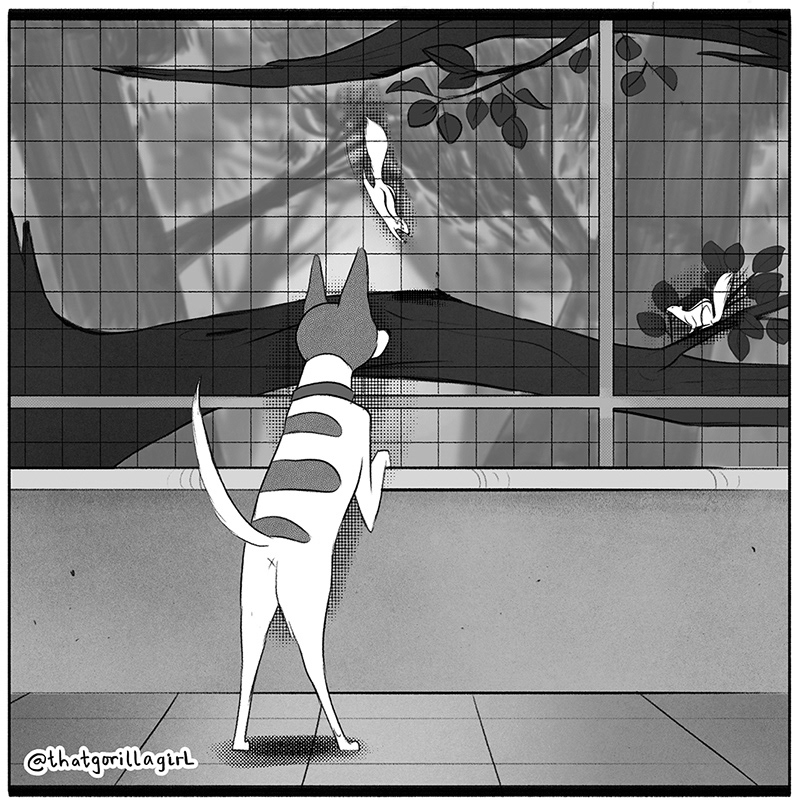
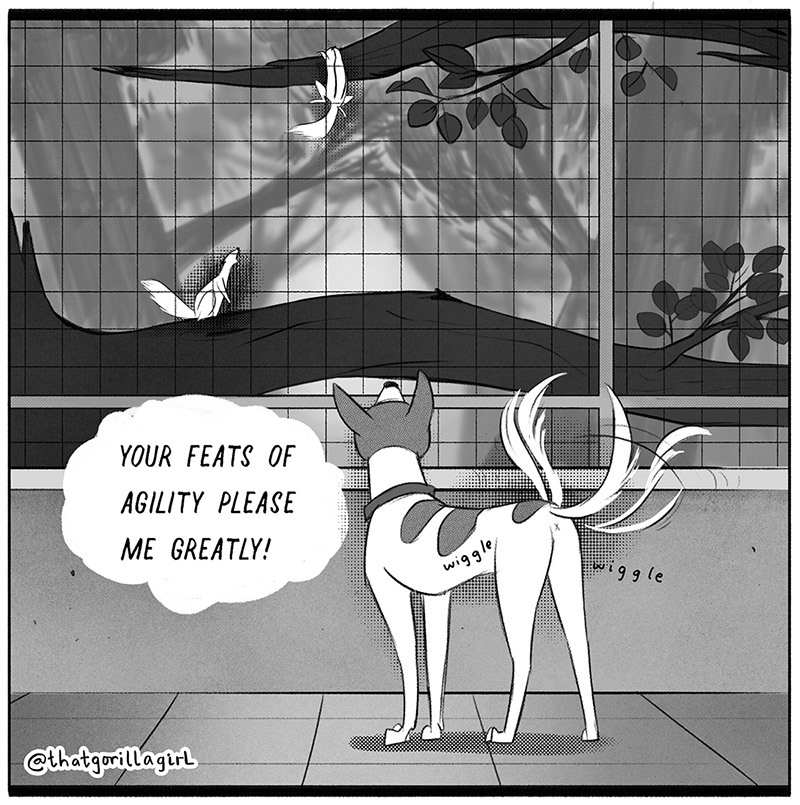
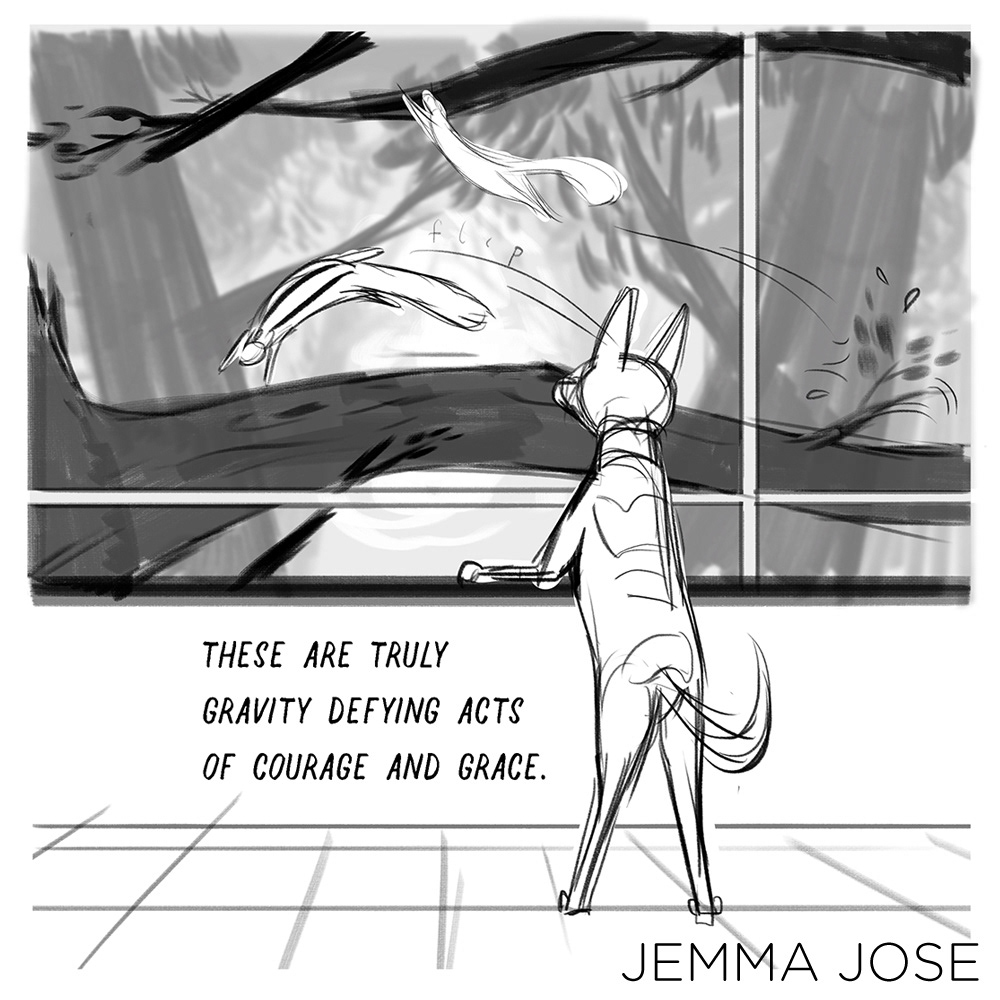
The comic below started with Roku looking at two squirrels and an idea morphed in my mind about them doing an acrobatic dance for Roku. I came up with three main pieces of dialogue, which then required two preceding panels to establish the scene. That's a total of 5 images or panels to tell the story.
Most of my ideas come from simple observation and are inspired by real-life incidents and I like to flesh out a story in words before making any drawings. The comic below, was inspired by Roku looking out of windows. I see him do this everyday and it got me thinking: what's going through his head while he looks outside? Is he admiring the cityscape? Or cursing a bird on a wire? These observations helped me form a story that I could tell through Roku's 'mind-voice' or his internal monologue.
The comic below started with Roku looking at two squirrels and an idea morphed in my mind about them doing an acrobatic dance for Roku. I came up with three main pieces of dialogue, which then required two preceding panels to establish the scene. That's a total of 5 images or panels to tell the story.

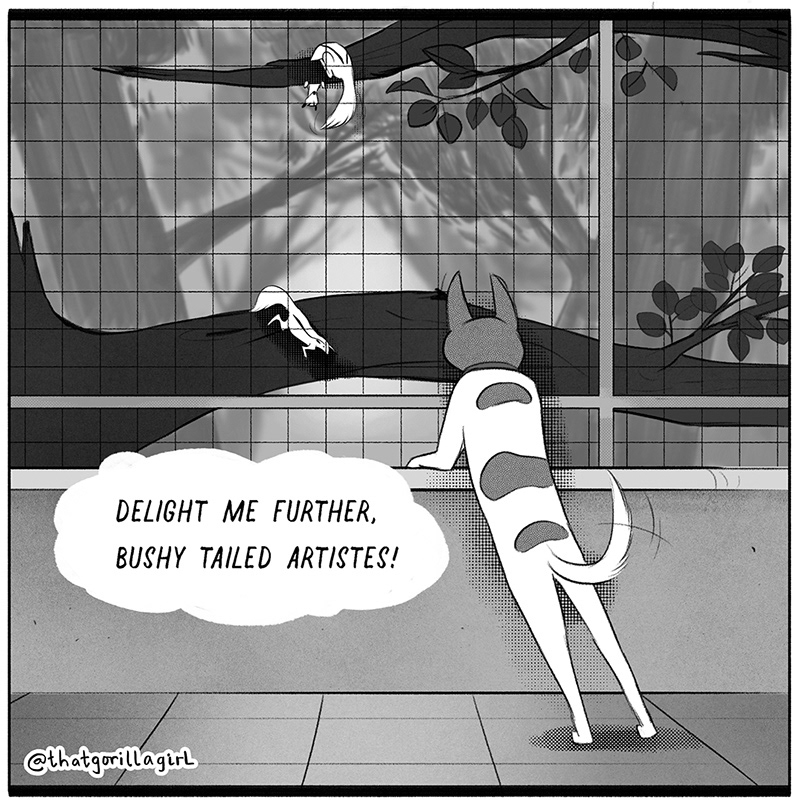
Roku's mind-voice is highly sophisticated, vividly descriptive and hella verbose. It's inspired by the spirit of Bertie Wooster, the beloved main character from the Wooster and Jeeves series by P.G. Wodehouse (one of my favourite authors), though I fall woefully short from being able to capture that humorous way of speaking. I try my best though. Once the story is written, it's on to...
Rough sketches and story thumbnails
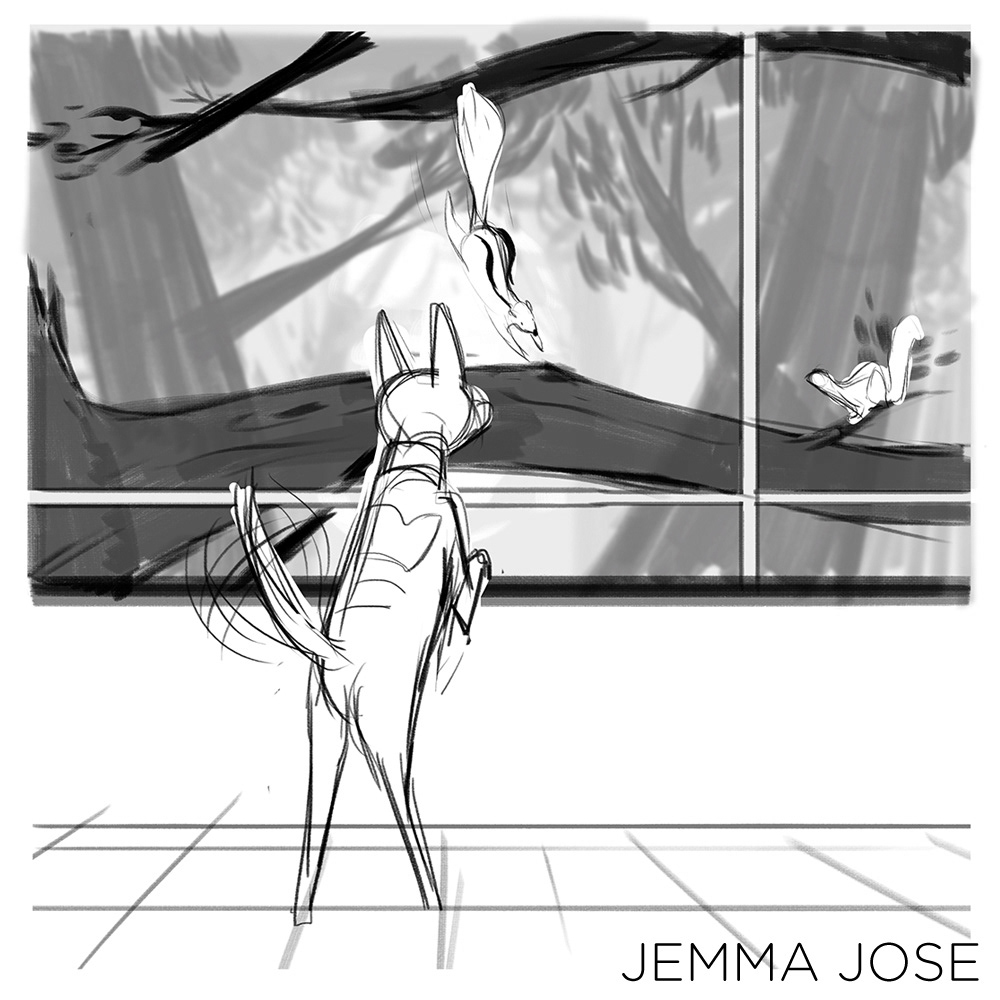
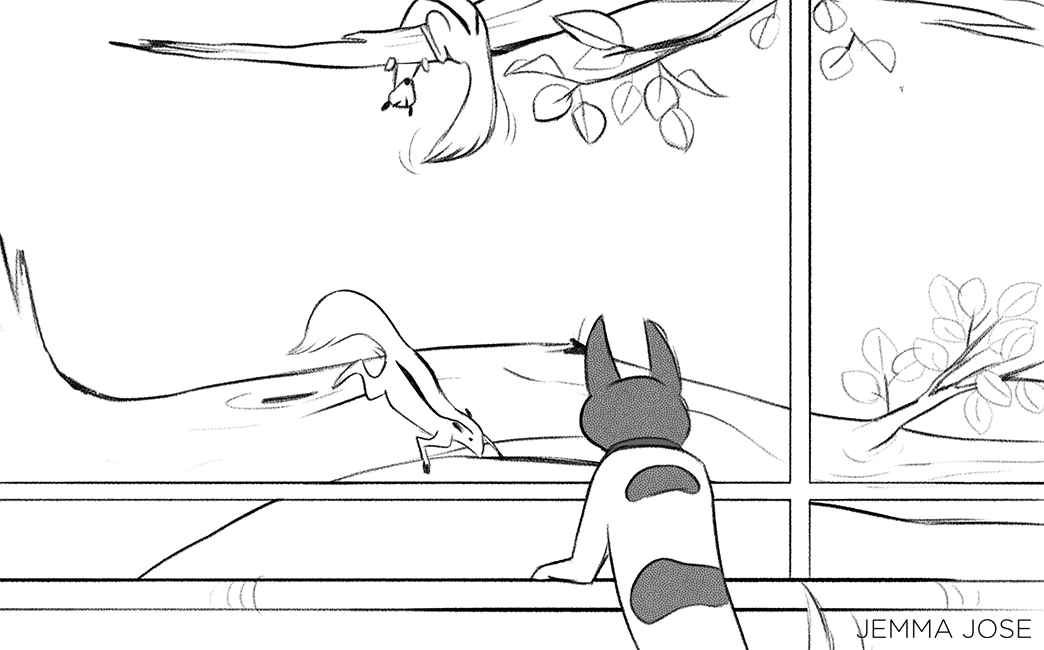
Visualising the story starts while I am writing it. With this comic, I knew the action would be happening in front of a large window and a tree outside, so I tried a couple of compositions to see which one worked best.

I decide to go with the one on the bottom left. Next, I make quick, rough sketches of all the panels ( shown below). I like to use a soft, pencil brush for my sketches as it helps me keep my lines loose. Since this is made for social media and viewing on a phone, I try not to get fussy with details. The comic needs to be easily readable. So, I've learned to nitpick less on smaller details and focus more on framing the main characters and dialogues.

Inking and Fills
This is the most meditative part of the process for me. Majority of the corrections have been taken care of in the rough stage so, all I have to do is follow the lines and make small tweaks in proportion wherever required. I like to keep the character and backgrounds on separate layers so I can go back and edit anything easily. I used Adobe Photoshop CC and a Wacom Intuos Pro (Small) to make this finished artwork.
I like my lines to have a loose, sketchy feel, so I go for what I call casual lineart. It's not super precise, but it's clean lineart that retains a lot of character of my loose, rough sketches.
I like my lines to have a loose, sketchy feel, so I go for what I call casual lineart. It's not super precise, but it's clean lineart that retains a lot of character of my loose, rough sketches.
Brushes
Here are few of the Photoshop CC brushes that I love using for drawing, inking and fills ♡
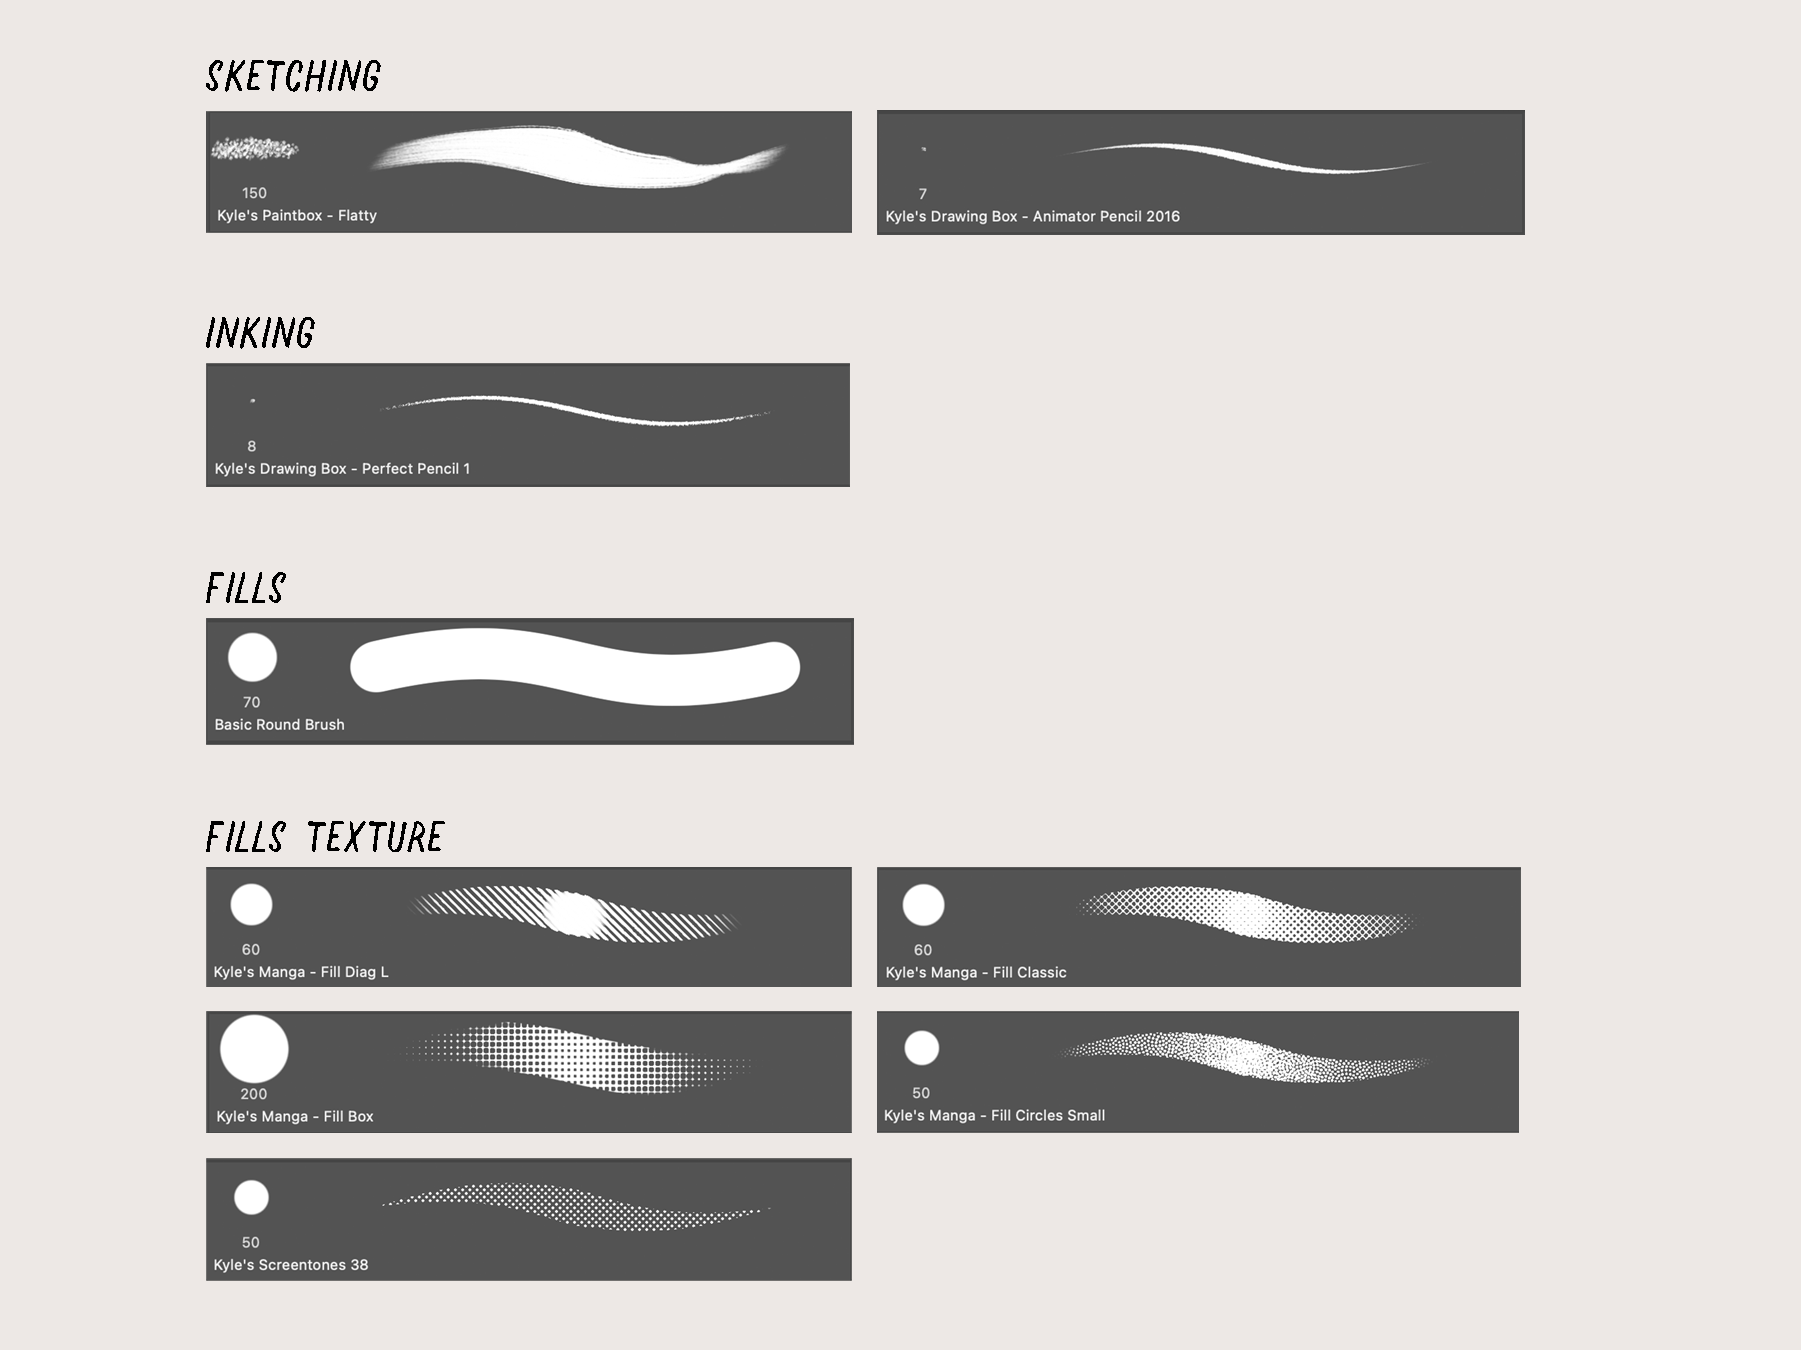
To be honest, ALL the brushes from Kyle T. Webster's Manga Brush Pack are amazing for getting the look and feel of a nice, old-school comic! Pick any one and play around with it and you are guaranteed to get some pretty awesome results.
These and other superb brush sets are included with purchase of the Adobe CC Suite.
These and other superb brush sets are included with purchase of the Adobe CC Suite.
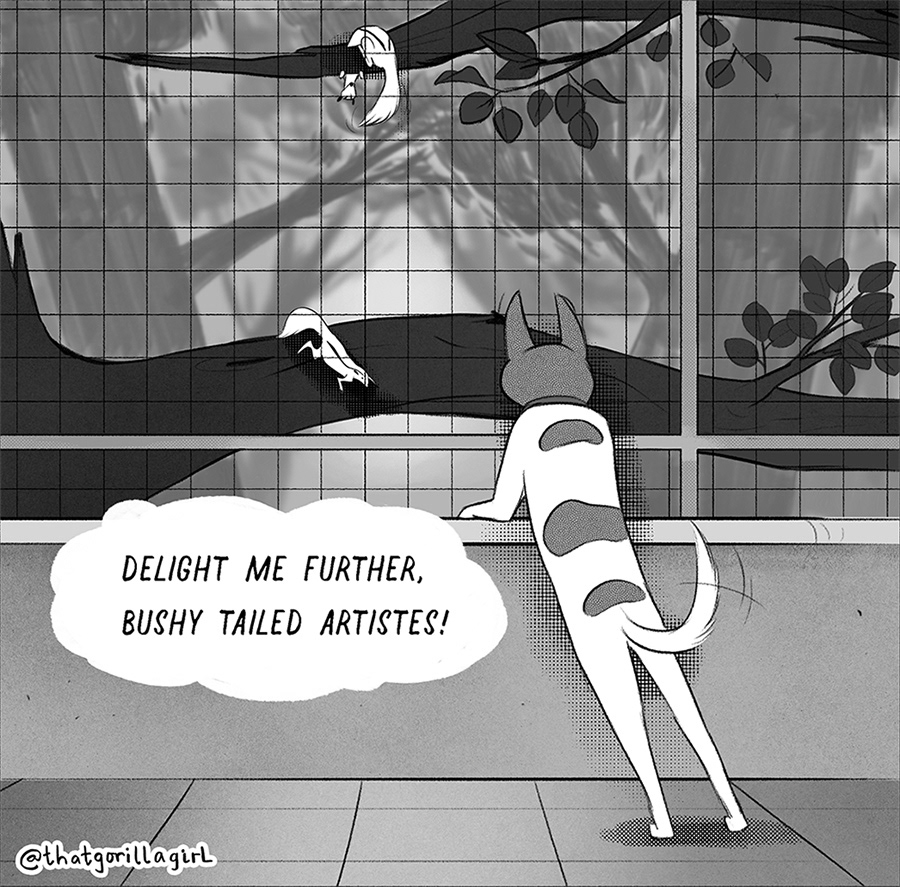
Here's a fully finished panel. I add my social media handle or signature and resize the image so that it's not too heavy when uploading.
And that's it! I upload the comic on social media for Roku's legions of followers to enjoy.
For more Roku comics and other digital artwork, be sure to check out my Instagram page. Thanks for reading ♡ and I hope you found this tutorial helpful!
For more Roku comics and other digital artwork, be sure to check out my Instagram page. Thanks for reading ♡ and I hope you found this tutorial helpful!